CLICK HERE FOR FREE BLOGGER TEMPLATES, LINK BUTTONS AND MORE! »

Tuesday, October 25, 2011

I Spy Halloween bottle!

I have been NEEDING to make an I spy bottle of some sort for a long time. I think I even mentioned it last year; obviously I never got around to it. Well, I had bought a bunch of little things for a sensory bin for Colton and decided I HAD to make a bottle too! This has been a go-to item for car rides and appointments.
The husband's idea was not to fill the bottle as full so it would be a much easier way to spot the items inside. However, the next one I make will be just a tad fuller, to make it more challenging. I will also add more items too. This one, the husband said stop adding items. I so should not take his advice when I know different but hey it was my first one and Colton loves it.
From a past sensory bin I had the kernels and black beans already mixed. I added some bright and cute Halloween stickers. A few spider rings...the black ones have been a challenge to find which I really like. Plus, I added some candy corn which is easy to spot and count. I then super glued the top on and voila!


Halloween Fun pt.1

The husband has been having a crazy work schedule lately and so a few days every other week have left us without a daddy and husband. I do like the time alone with Colton and some days are harder than others for me lately with the attitude he has discovered and me just growing and getting more and more tired with the pregnancy.

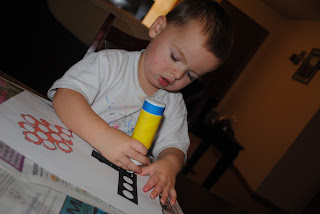
As most, if not all of you know I LOVE to craft especially with Colton. I printed off a bunch of worksheets and fun for Colton. 2 teaching mommies has some I printed. I also printed some from somewhere else, but I can't remember. We have had a lot of fun!
Arm and hand tree with fingerprint leaves! I am working on a frame for this as well.


Fist/knuckle pumpkins. I took a green marker and made vines to each pumpkin, added a vine saying and  an orange frame.
He is majorly improving on following the lines!
This is our centerpiece on our dining table

There are a bunch more worksheets and games we will be working on this week. Hopefully I can show them to you before Halloween is over.

A new way to make eggs QUICKLY!

Have you ever wondered how scrambled eggs don't take as long but when you make an actual egg it takes a little longer and sometimes if you are like me you mess it up and it doesn't look much like an egg?

Well, I found this RECIPE. What you do is spray a muffin tin with cooking spray so the eggs don't stick. Crack one egg in each little compartment. Bake @350 for 10-15 minutes. Just keep an eye on them. if you want the yolk to be a little runny I would take them out a little sooner. These eggs have turned out perfect every time! Plus, they make for great breakfast sandwiches in the morning!

Add a little salt and pepper along side some yummy toast and I have a perfect breakfast!


Crayon Art

All around blogging land I have found the ever so popular melted crayons with a blow dryer or run though with a glue gun art. I am not posting where I found the idea because I honestly have seen it everywhere.

I wanted to try the one where you put the crayons through the glue gun onto a canvas because it would be easier for Colton to do. Well, my glue gun is too small. So, I then grabbed a few crayons and sort of hap-hazardly taped them onto the canvas. I didn't want the actual crayons to be shown on the canvas, just the melted version. Well, I gave Colton the blow dryer and he thought it was a lot of fun watching them melt. The way they melted was not in a neat clean type I was kind of hoping for. I kept thinking it still looked very cool just where and how will I hang it? It took me a minute and I instantly thought-MONSTERS! I hurried and grabbed the googly eyes and glue...gave the monsters some crazy eyes or eye. Once done, I was actually quite excited seeing as how I haven't accumulated many Halloween decorations and this was just awesome.


So, because something may not have worked out like you initially was hoping or going for doesn't mean it still isn't something worth admiring. This is what ART is all about. Now, go create!


Tuesday, September 27, 2011

Butterfly feeder

A couple weeks ago we had a butterfly unit. While online I found a great idea to feed butterflies. I thought this would be a great way to get some butterflies to come to our house to eat. I found the idea HERE.

What you need:
colorful sponges
yarn,string,twine(your choice)
a knife or scissors
water
sugar

What to Do:
Cut 2 holes or slits on both sides of sponge and pull your string through. You want to make sure you will be able to hang them. So make sure the strings are at the length you choose. Also, when choosing the colors for your sponges, butterflies tend to like the more vibrant colors like red,green,and yellow.Boil 4 parts of water. Add 1 part sugar to the boiling water until dissolved. Let it cool a bit. Dip your sponges in the nectar to soak up as much as the sponge can and hang them outside. We hung ours in the tree in out front yard.
*left over nectar lasts up to 1 week in the fridge*

I forgot about them hanging in the tree and so I don't know if we had any visitors. 

Monday, September 26, 2011

Blog Hoppin Tuesday!


Come Join in the fun!


Recipe of the Week: Easy Italian Bake!

I love cooking and baking and I am more of a semi-homemade type of cook. However, depending on what it is and difficulty I do like to try a full homemade. My family gets bored with having the same kinds of meals all the time and I get bored making them. I really like to fill everyone's pallets as well as I can.
My new favorite website is Pinterest and I stumbled upon this recipe looking up something quick and easy to make. I new I had to try this recipe because we love our pasta!

What you need:
1 lb ground beef(I used very lean meat)
1 box penne pasta(you could use any kind of pasta, I wouldn't use spaghetti though)
1 jar spaghetti sauce(or you can make your own)
1/3cup parmesean cheese divided
1 1/2 cups mozzarella cheese

What to Do:
Preheat oven to 375
Boil water, add noodles and cook them until tender. I like to rinse my noodles and drain them.
Brown the meat in a skillet. DRAIN
Add meat to the noodles, sauce, and 1/2 of parmesean cheese. Mix well.
Put mix into a 9x13 dish  and top it with the rest of the parm and mozzarella cheese.
Bake 20 minutes!
HUGE hit in our house! Everyone loved it and it will definitely be making some more appearances in the house.
You can serve this with a salad and garlic bread too. Very yummy and delish!
Take time and enjoy your Rays of Sunshine!